How to Set Up DKIM for SendGrid?
Note: Irrespective of whether you are using a shared or dedicated IP, SendGrid automatically enables DKIM for all outbound emails to improve email deliverability, and generates 2 CNAME DKIM records for you to publish in your domain’s DNS for your specific DNS hosting service to configure the protocol.
In order to enable DKIM for SendGrid go through the following steps:
1. log in to your SendGrid account
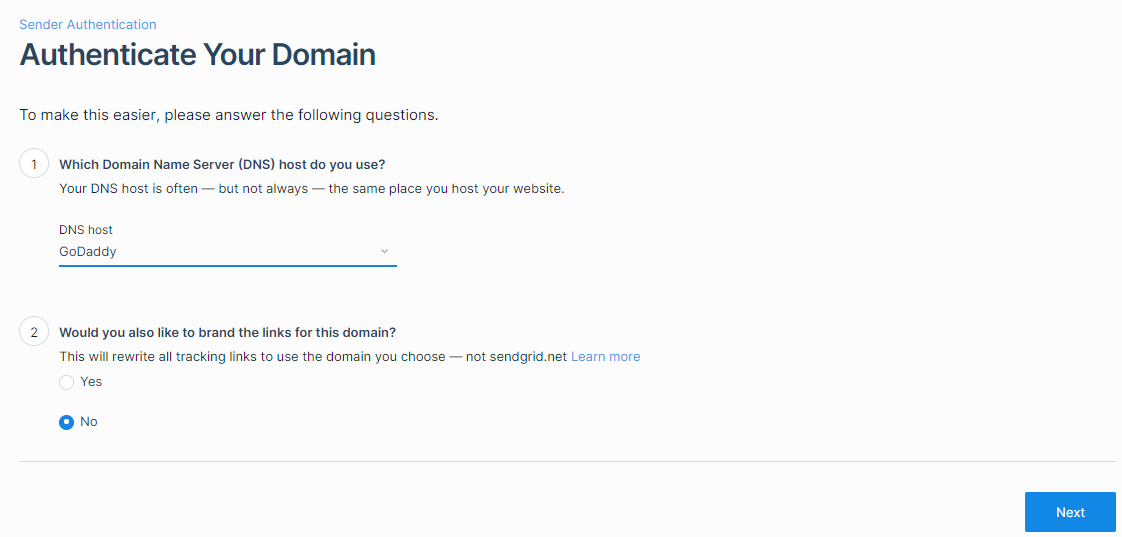
2. Go to Settings > Sender Authentication > Authenticate Your Domain by clicking on Get Started

3. Now choose your DNS Host (GoDaddy, Bluehost, Cloudflare) from the options and click on Next.

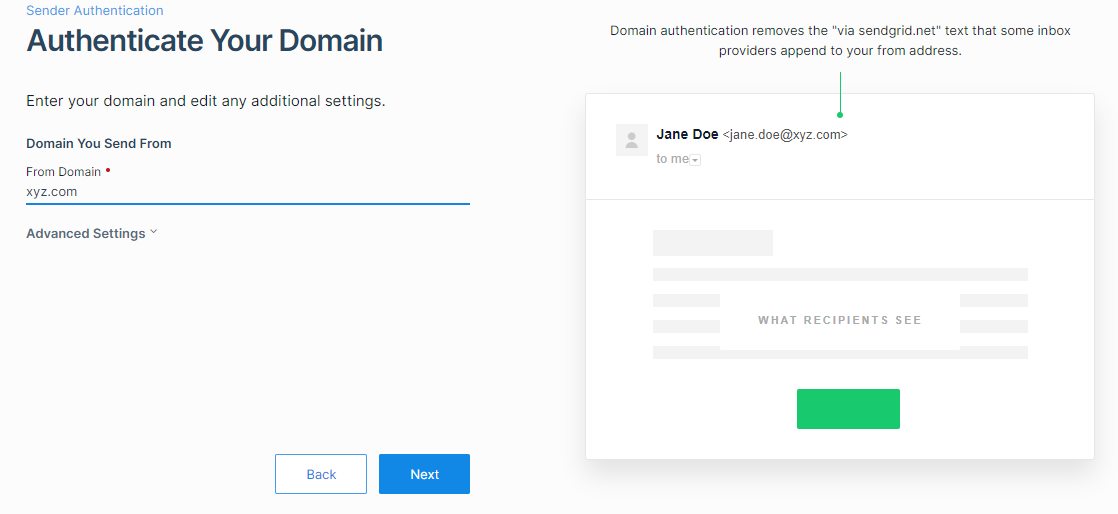
4. Enter the domain name you would like to authenticate and click Next.
5. You will be able to see 2 DKIM records now (Selector1 – s1 and selector 2 – s2) respectively.

6. Now you may publish these 2 DNS records for your domain and we’ve completed the DKIM authentication setup process for SendGrid.
 Standard Email Protocols: SMTP, POP3 & IMAP Free4 m
- What is Email Security? Free4 m
- Email Security Practices Free4 m
- Building an Email Security Compliance Model Free5 m
- Corporate Email Security Checklist Free3 m 30 s
- What is the difference between Inbound email security and outbound email security? Free4 m
- What is Information Security? Free4 m
- Zero Trust Security Model Free3 m
- What is a DNS Lookup? Free4 m
- Understanding the 10 DNS Lookup Limit for SPF Records Free3 m
- SPF Void Lookups Explained Free2 m
- Creating and Optimizing SPF records for your own domain Free4 m
 Video Free2 m
- What is SPF Permerror and How to Fix It Free7 m
- Video Free2 m
- SPF Flattening Free5 m
- SPF Macros Free9 m
- Video Free2 m
- What is SPF Alignment? Free3 m
- How to Set Up Microsoft Office 365 SPF record? Free4 m
- How to Set Up Google Workspace SPF Record? Free2 m
- How to Set Up MailChimp SPF Record? Free3 m
- How to Set Up SendGrid SPF Record? Free2 m
- How to Set Up Salesforce SPF Record? Free3 m
- How to Setup Zoho Mail SPF Record? Free2 m
- What is DKIM Alignment? Free3 m
- DKIM Domain Alignment Failures Free6 m
- How to Set Up DKIM for Microsoft Office 365? Free4 m
- How to Set Up DKIM for Google Workspace? Free3 m
- How to Set Up DKIM for MailChimp? Free4 m
- How to Set Up DKIM for SendGrid? Free3 m
- How to Set Up DKIM for Salesforce? Free3 m
- How to Set Up DKIM for Zoho Mail? Free3 m
- DMARC RFC 9989, 9990 and 9991 Free5 m
- What is DMARC Compliance? Free2 m
- DMARC Compliance Requirements Free2 m
- The Benefits of DMARC Free2 m
- DMARC Configuring Free3 m
- Achieving DMARC Enforcement Free2 m
- DMARC Vs Antispam Solutions Free2 m
- DMARC Identifier Alignment Free2 m
- DMARC sp Tag Exceptions & Uses Free1 m
- Configuring DMARC without DKIM Free3 m
- Configuring DMARC without SPF Free2 m
- DMARC Aggregate Report Views Free3 m
- Video - PowerDMARC Aggregate Reports Free2 m 13 s
- DMARC Forensic Report Views Free2 m
- Video - PowerDMARC Forensic Reports Free0 s
- DMARC Forensic PGP Encryption and Decryption Free2 m
- TLS Report Views Free3 m
- Video - PowerDMARC TLS Reports Free0 s
- PDF/CSV Reports Free2 m
- Video - PowerDMARC PDF/CSV Reports Free1 m 1 s