How to Set Up DKIM for Zoho Mail?
Steps to Setup DKIM for Zoho Mail
Go through the following steps to configure DKIM directly from your Zoho Mail account:
Generating DKIM record on Zoho
1. Log in to your Zoho mail control panel as an admin or super admin
2. Navigate to Email Authentication and click on DKIM. The DKIM configuration opens up.
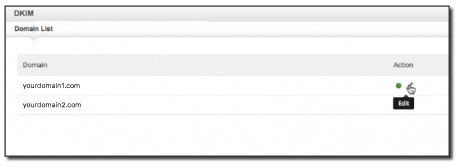
3. Navigate to the domain (yourdomain.com) for which you want to configure DKIM for, and click on the Edit icon.

4. Choose Add Selector
5. Add a new DKIM selector for your domain (e.g. s1)
6. Click on Save
7. A text box will be displayed below, showing a TXT record value that includes your DKIM public key

8. Copy this text value to publish it in your domain’s DNS
Publishing DKIM records in the DNS
1. Log in to your DNS management console
2. Create a TXT record in your DNS with the title: <selector>._domainkey.<yourdomainname.com> for example s1._domainkey.yourdomainname.com
3. In the section allotted for the TXT record value, paste the copied contents (the DKIM TXT record value that you previously copied from the Zoho Mail control panel)
4. Click Save
Verifying DKIM Record Configuration on Zoho
1. Navigate back to the Add Selector page in your Zoho Mail control panel wherein you had created your DKIM record
2. Click on Verify for the specific selector
3. When the verification status changes to verified, a dialogue box appears asking whether you want to enable DKIM immediately or later. Click on enable DKIM immediately.
As soon as you activate DKIM, your DKIM signature will be added to all the outgoing emails sent from your domain
Standard Email Protocols: SMTP, POP3 & IMAP Free4 m
What is Email Security? Free4 m
Email Security Practices Free4 m
Building an Email Security Compliance Model Free5 m
Corporate Email Security Checklist Free3 m 30 s
What is the difference between Inbound email security and outbound email security? Free4 m
What is Information Security? Free4 m
Zero Trust Security Model Free3 m
What is SPF Alignment? Free3 m
How to Set Up Microsoft Office 365 SPF record? Free4 m
How to Set Up Google Workspace SPF Record? Free2 m
How to Set Up MailChimp SPF Record? Free3 m
How to Set Up SendGrid SPF Record? Free2 m
How to Set Up Salesforce SPF Record? Free3 m
How to Setup Zoho Mail SPF Record? Free2 m
What is DMARC Compliance? Free2 m
The Benefits of DMARC Free2 m
DMARC Configuring Free3 m
Achieving DMARC Enforcement Free2 m
DMARC Vs Antispam Solutions Free2 m
DMARC Identifier Alignment Free2 m
DMARC sp Tag Exceptions & Uses Free1 m
Configuring DMARC without DKIM Free3 m
Configuring DMARC without SPF Free2 m
DMARC Aggregate Report Views Free3 m
Video - PowerDMARC Aggregate Reports Free2 m 13 s
DMARC Forensic Report Views Free2 m
Video - PowerDMARC Forensic Reports Free
DMARC Forensic PGP Encryption and Decryption Free2 m
TLS Report Views Free3 m
Video - PowerDMARC TLS Reports Free
PDF/CSV Reports Free2 m
Video - PowerDMARC PDF/CSV Reports Free1 m 1 s